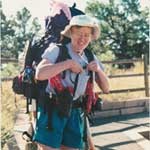
These are suggestions from Jan Latham, guide for Section Hiking the Appalachian Trail
So---you're looking for a new backpack. You've decided on the size you need, noted any special features you would like and are open to 'sticker shock' but hoping to be surprised with a good sale. Off you go to your local outfitter. One of the nice things about shopping for backpacking equipment is that most outfitters provide special training for their salespersons in specific areas so that they are ready to help.Even though most of the outfitters do provide these knowledgable sales people it is advantageous to go in with a working knowledge of what goes into fitting a backpack.Also, plan on spending at least 20-30 minutes just walking around in the store with your final choice loaded with the appropriate amount of weight. Make sure you know what the return policy is just in case the purchased backpack does not perform as anticipated when loaded with your own equipment.
The best backpacking trips will result in having equipment that works well, fits and/or functions well and that your know how to use efficiently. Your backpack is the first place to start.
Ten steps to getting a good in-store fit:
- Have your torso length measured. This is the single most important thing you can do.Backpacks don't care how long your legs are, or how tall you are, only how long your torso is. Your torso length runs from the most prominent vertebra at the top of your spine (roughly in line with the top of your shoulders) and ends at a point on the spine in line with the top of the hip bone.
- Based on your torso length measurement, select the correct frame size, and be sure to put the shoulder harness in the correct slot that corresponds to your torso length if the brand and model you are trying has this option.
- Loosen both shoulder harness straps as well as the shoulder stabilizer strap (the ones on top of the harness, and extending upwards at an angle and connecting into the top of the backpack).
- Put the amount of weight you plan to be carrying. Ideally, put a sleeping bag in the bottom and the weight above and close to the back.
The following steps should be done with the pack on your back and with you bent at about a 45 degree angle---basically looking at your shoes. Do not straighten up until the last of the straps have been tightened. - Put the pack on, clip and tighten the waist belt buckle. The buckle should be level with your belly button. This is important. Many people have the tendency to wear the waist belt too low. This means that the weight is not centered over the top of your hip bones and will be putting more stress on your thighs and knees. Also, in the lower position, the belt will slip down lower as you hike, pulling down on your shoulders and away from your back. None of these actions promote comfort.
- With the waist belt in the correct position clip the sternum strap into place just slightly snug.
- Next, tighten the straps on the bottom of the shoulder harness.These straps are grasped at the bottom of the shoulder strap (under your arms) about hip height and pulled toward your back.
- Now tighten the shoulder stabilizer strap or lifter straps at the top of each shoulder harness.
- Now stand up--- If you have selected the correct frame, and have the wait belt correctly positioned, the shoulder stabilizer strap should be at a 45 degree angle. (If this angle is greater than 60 degrees or less than 30 degrees then the torso length needs adjustment or choose a different backpack.)
- You should be able to insert one-two fingers between the top of your shoulder and the padded shoulder strap(this is important). At this point the backpack should feel comfortable if fitted correctly.
Depending on the brands that you are looking at there are other features which can help with a more custom fit. Many models offer interchangable hip belts ranging in size from small to large, shoulder harnesses that are more padded and female specific belts and shoulder harnesses. If you are shopping for a day pack these usually are not as adjustable and come in short, regular and sometimes long torso length. There are several companies who make female specific day packs as well.
If you are an internet shopper you still need to go through the step of measuring your torso and making sure that the backpack you are purchasing can be adjusted to that number. There are some great deals to be found out there and often spending a bit of time searching will result in a great deal. Be sure to check out the sites geared for women only travel and backpacking for women. These sites along with sites geared toward lightweight backpacking tend to include reviews or suggestions on female specific equipment.
A well fitted pack will:
- transfer most of the weight from your shoulders to your hips. You may feel some pressure on the front of your shoulders but should not feel that your shoulders are carrying the weight of the backpack.
- allow you to stand up fairly straight with only a small amount of forward lean (hiker's stance) to offset the pack's weight.
- not have any gaps on the top or bottom edge of the waist belt. There should be even pressure over the entire surface of the waist belt.
- fit against your back closely unless it is one designed with a webbed spacer for ventilation.
- with all of the straps snugly secure be stable and not shift around with your body movement.


